

How to Pack your Bike for Travel
make sure your rig arrives alive

Once, watching through the window of a loading plane, I saw baggage attendants hurl a bike bag that looked suspiciously like mine through the air onto a conveyor belt, ostensibly trundling the luggage up into the plane’s hold. The bag landed on the belt heavily, rode halfway up the precipitous diagonal, and then toppled to the ground, traversing a distance of over ten feet. That’s unfortunate, I thought. There was little I could do but wait until I arrived at my destination, where I discovered no damage at all to the bike. I was lucky, certainly, but careful packing of your whip can remove much of the stress of traveling with your bike, and today we’ll teach you how to disassemble a bicycle and protect it from luggage “handlers” everywhere (hey, the title says they just handle luggage; they aren’t called “careful luggage handlers”).
Types of Bags and Boxes
There are too many bags and boxes to describe how to utilize them all in one place, so we’ll walk you through the basics of bike disassembly. Your bag may not require all of these steps (I can think of several bags that don’t require the pedals to come off, don’t require the seat to come off, don’t require the handlebars to be removed) but the following workflow will ensure your bike has a fighting chance to make it to your destination in one piece.
Airline Policies
OK, this list is GUARANTEED to change over time, but here is a quick list of airline companies, links to their baggage policies, and how we feel about flying with them. Many airlines use “linear inches” as a measurement, which is total length + width + height of your luggage. If an airline has a limit on linear inches, we’ve included it here. With many of these companies, if you hold a credit card of the airline, your first bag is usually free. If you pack smartly, you can get your gear into your bike bag and your clothes in your carry-on, and you’ll be paying nothing.
Alaska Airlines: the gold standard at present. Bikes are simply a piece of checked luggage, and cost $30 (free with that credit card, though!). Make sure you keep it under 50 lbs., but their website says it all “We are glad to waive the oversize fee for bicycles.” Linear inches (before oversize) = 112, but we’ve never seen an Alaska rep measure a bag/box. Usually they give you a genuine smile and wave you over to the oversize counter.
Delta Airlines: same rules as Alaska: bikes are simply a piece of checked luggage, and cost $30. They don’t get top billing because they don’t add a breezy and upbeat tone to their website copy. On the other hand, you’re flying Delta, so you’re a boss. Linear inches = 112.
American Airlines: at American, you get up to 126 linear inches and 50 lbs. for the bike to be considered a standard bag. $30. No breezy upbeat tone, however, and you’ll have to fight the other gladiators in the arena of American. Good luck.
Southwest Airlines: SWA used to be the boss, with $50 bike fees, but now, frankly, they’re getting killed by Alaska, Delta, and American. If you make it under 50 lbs. and 62 linear inches (unlikely) the bag is a normal piece of luggage, which is FREE at Southwest. You’re unlikely to get there, though, so you’re looking at $75 each way.
Hawaiian Airlines: sure, you get up to 115 linear inches and 50 lbs., but you’re still looking at $100 to and from North America, and $150 internationally. Meh.
JetBlue: you’ll have to keep it under 80 linear inches for the bike to even be accepted onto the plane. If it is accepted, though, you get to pay $100! Woohoo! Not recommended.
United Airlines: as with all things United, it’s difficult to locate actual information. If you keep the bike below 50 lbs. and the linear inches under 62 (much smaller than Alaska or Delta!) the bike counts as a piece of standard checked baggage. $35 for the bag/box, or $30 if you pre-pay. N.B. it’s pretty unlikely you’ll get under 62 linear inches, so be prepared to pay the whole $150 each way fee for United. Not recommended.
Frontier Airlines: first of all, you have to download a PDF to get their sporting equipment guidelines. You still want to hear more? OK. Frontier is only here as an “abandon all hope ye who enter here” warning, or as a foil for woebegone United (all you United credit card holders can say “well, at least we’re not Frontier…). Frontier says that a bike only costs $75 each way, but knowing them we’re guessing that’s in addition to the checked fee (at least $40), and then as many other fees as they can add. Not recommended.
How to pack it
REmove Pedals

Standing on the pedal while pulling towards you on the wrench can really help with sticky pedals
Most airlines insist that these come off, and most bike boxes insist, too, insofar that you won’t be able to get the bike in the box if you leave them on. Most pedals use an 8mm hex wrench (a few use 6mm hex wrenches).
Remove your pedals first because otherwise you’ll be grinding your fork or rear triangle into the ground. Insert the wrench into the pedal (you go through the frame side of the crank) with the crank in the 3 o’clock position. Step on the pedal with one foot and pull up on the wrench to loosen the pedal. PRO TIP: pack some grease so when you re-install, you can grease the threads of your pedals (every thread of your bike should be greased when torqued).
Mark seatpost with tape and remove

A classic error is to disassemble your bike, pack it, and then have exactly zero idea where everything was set when you arrive at your destination. Mark everything that needs marking and you’ll ensure your professional bike fit will get replicated at your destination.
For your seatpost, wrap a piece of tape where the post inserts into the frame. You’ll know where to insert the seatpost to. Nice bonus? The tape will double as slippage-insurance. For handlebars, use a paint pen (or electrical tape) to mark where the bars line up with the stem.
remove seatpost

Many seatposts have some kind of wedge to keep everything in place—don’t lose it!
OK, this one is pretty simple, but we’re putting it up here because if you forget your seatpost you are, um, SOL at your destination.
Double check to see if you marked the post with tape (above) and then remove the seatpost. Many modern bikes have some kind of wedge that secures the seatpost via friction, so make sure you’ve got the wedge, too! Put that in plastic baggie with your pedals.
Secure Electronic Cabling
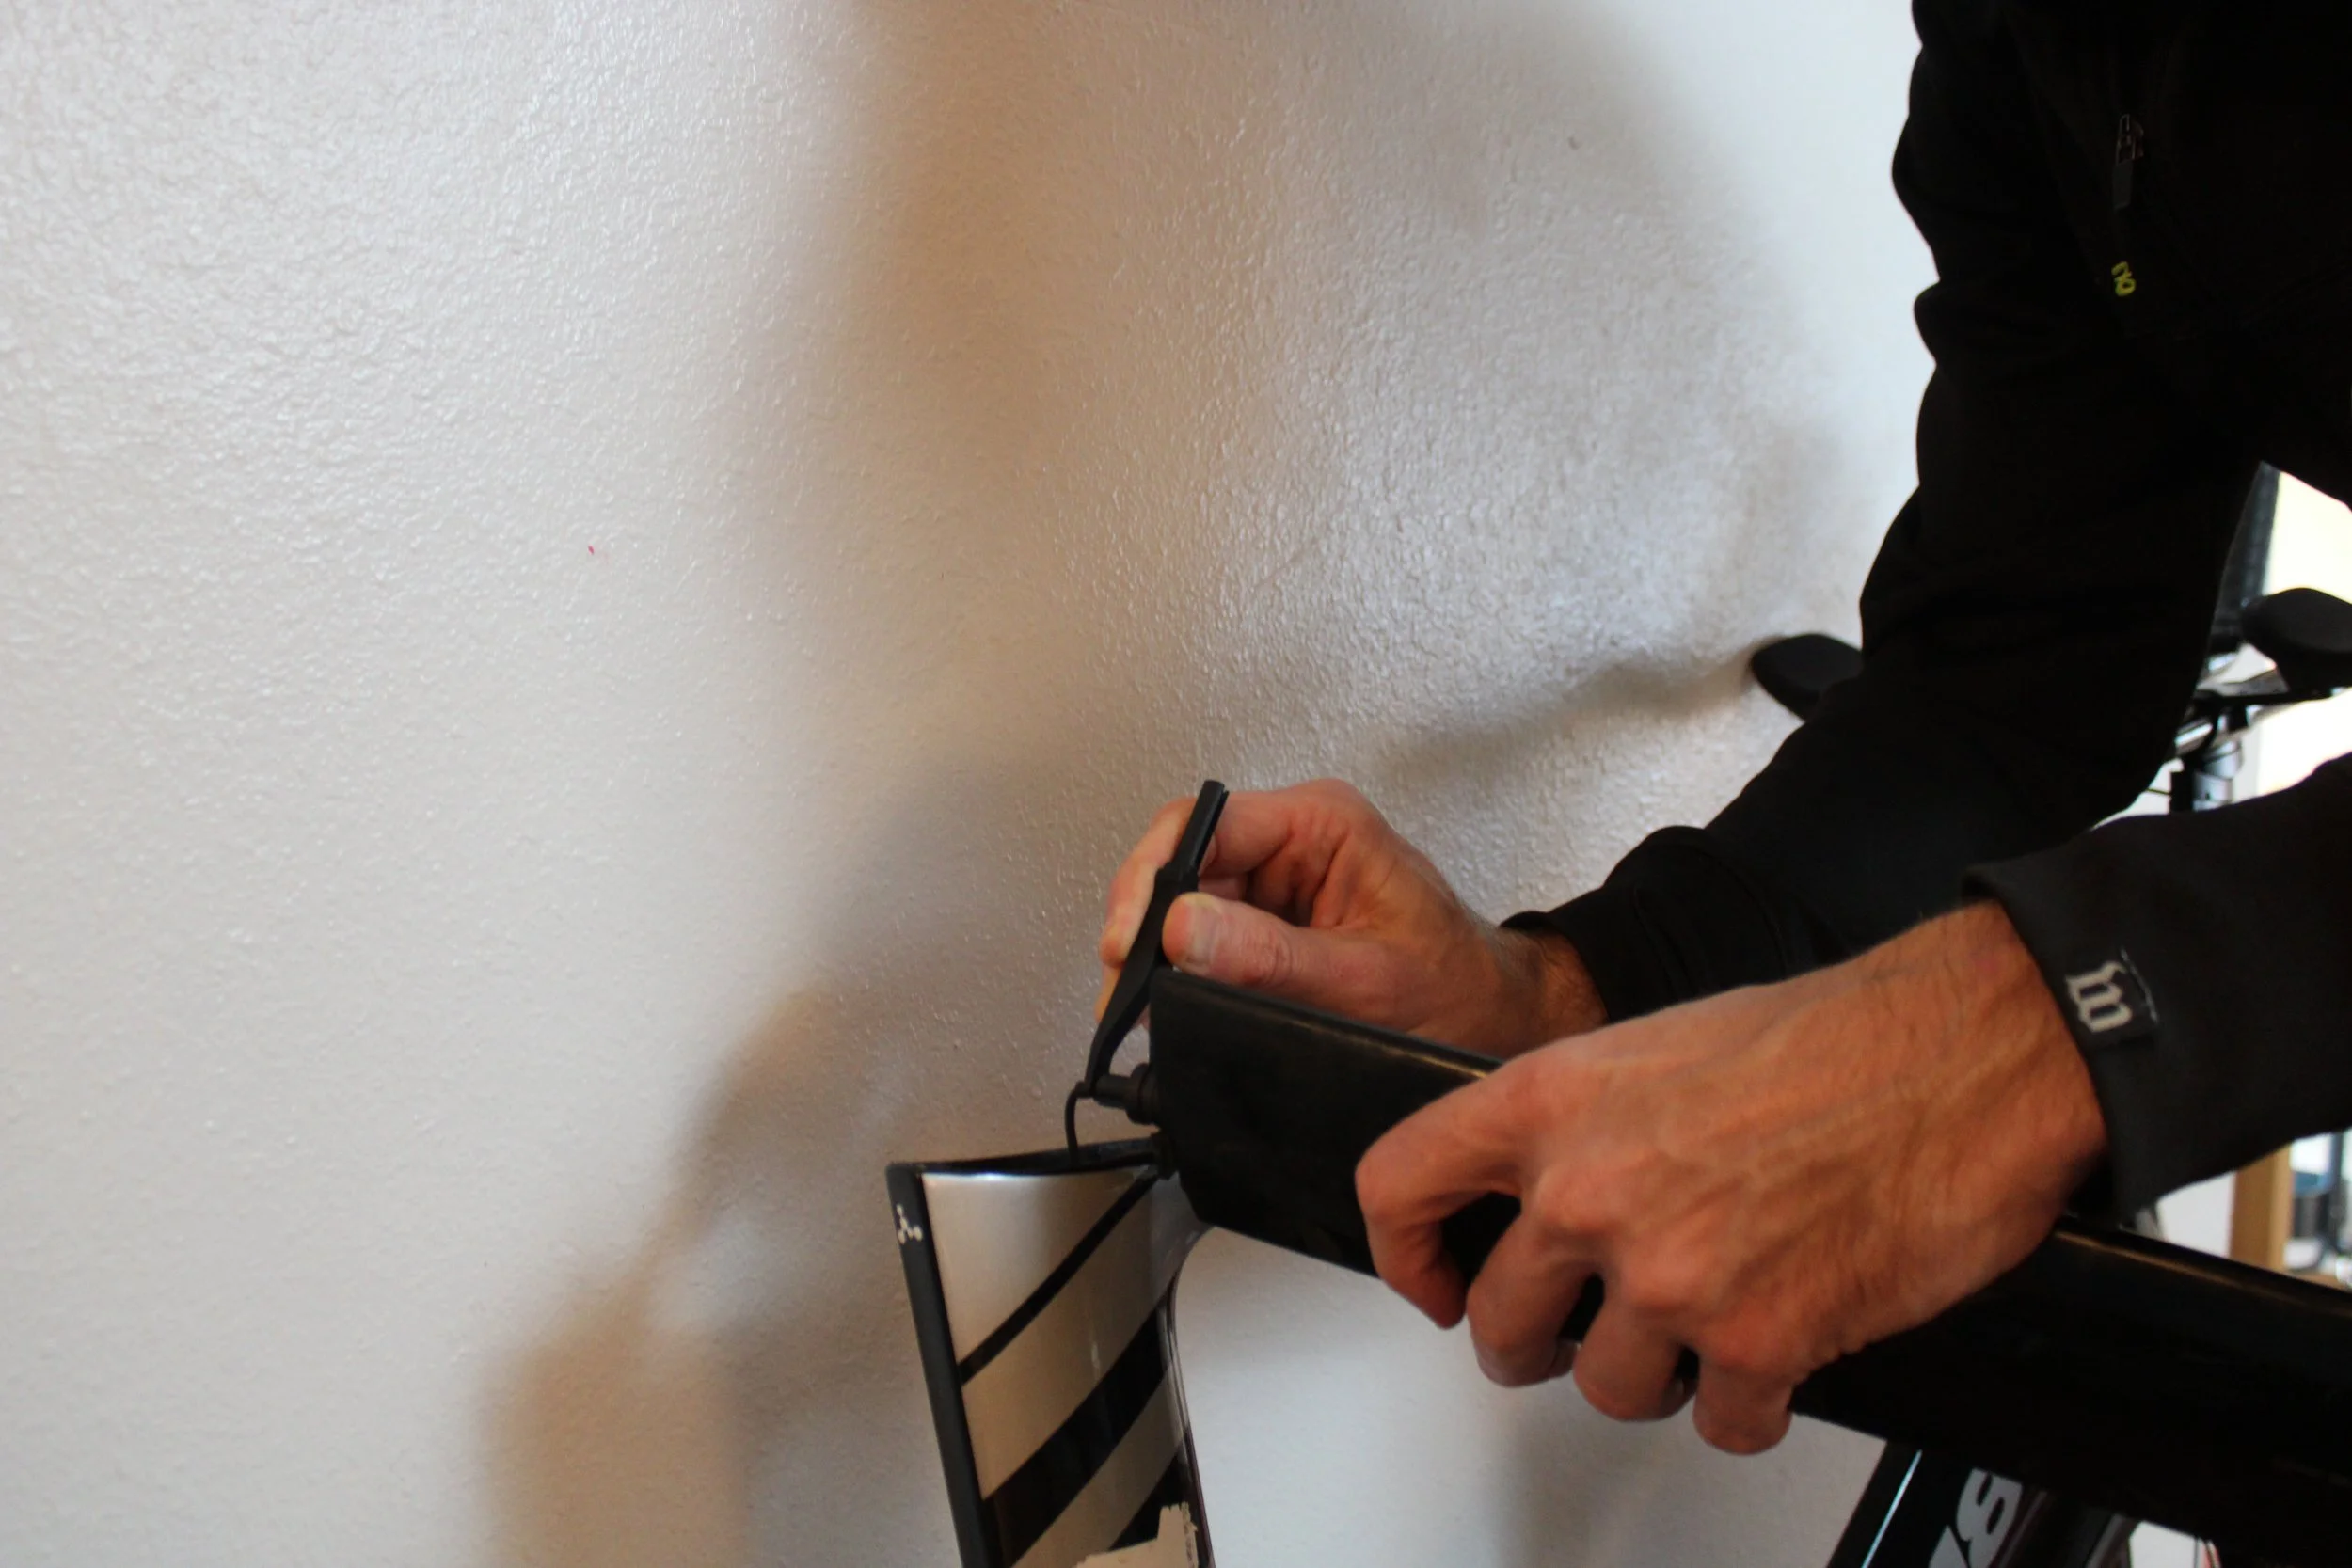
Use that Di2 Tool!

Secure with electrical/black tape
If you have electronic shifting with wires, heed this step. Otherwise, move on. Many bikes place the battery in the seatpost, so this step makes sense after our last step.
The battery will likely stay in the seatpost, but there could be a cable sticking out of the frame. Tape it to the frame so you don’t lose the cable inside the frame! Oh, and you took the cable out of the battery with the cable removal tool, right? Right?
Remove Wheels/Pack Skewers

OK, now we’re ready to take off the wheels. Undo the quick-releases (rim brake bikes) or the thru-axles (disc brakes) and PUT THE SKEWERS IN THE BAG WITH THE PEDALS. If you have thru axles, though, slip them back through the front and rear dropouts (are they really dropouts anymore?) and snug them down. You’re less likely to lose them this way, and the axles will protect your frame from, um, compression issues. If your bag/box has a place for your wheels, put them there. Otherwise, hold off as wheels usually go in the box last.
Install Fork/Dropout Spacers
Rear spacers keep your frame from, um, compression by the baggage handlers
If your bike has thru-axles, they double nicely as spacers—just re-install them without the wheels!
Fork spacers probably came with your bike, and they take up the space between your front and rear dropouts (where the skewers/axles go) so your bike can’t be compressed during travel.
Since you just took off the wheels, this space where the skewers or thru-axles were is now free—in case you’re curious, that area is called the dropout of your bike frame. If you have skewers, you’ll press the spacers into the dropouts. If you use thru-axles, simply keep the thru-axles in the frame as we suggested above.
Wrap Frame in Padding
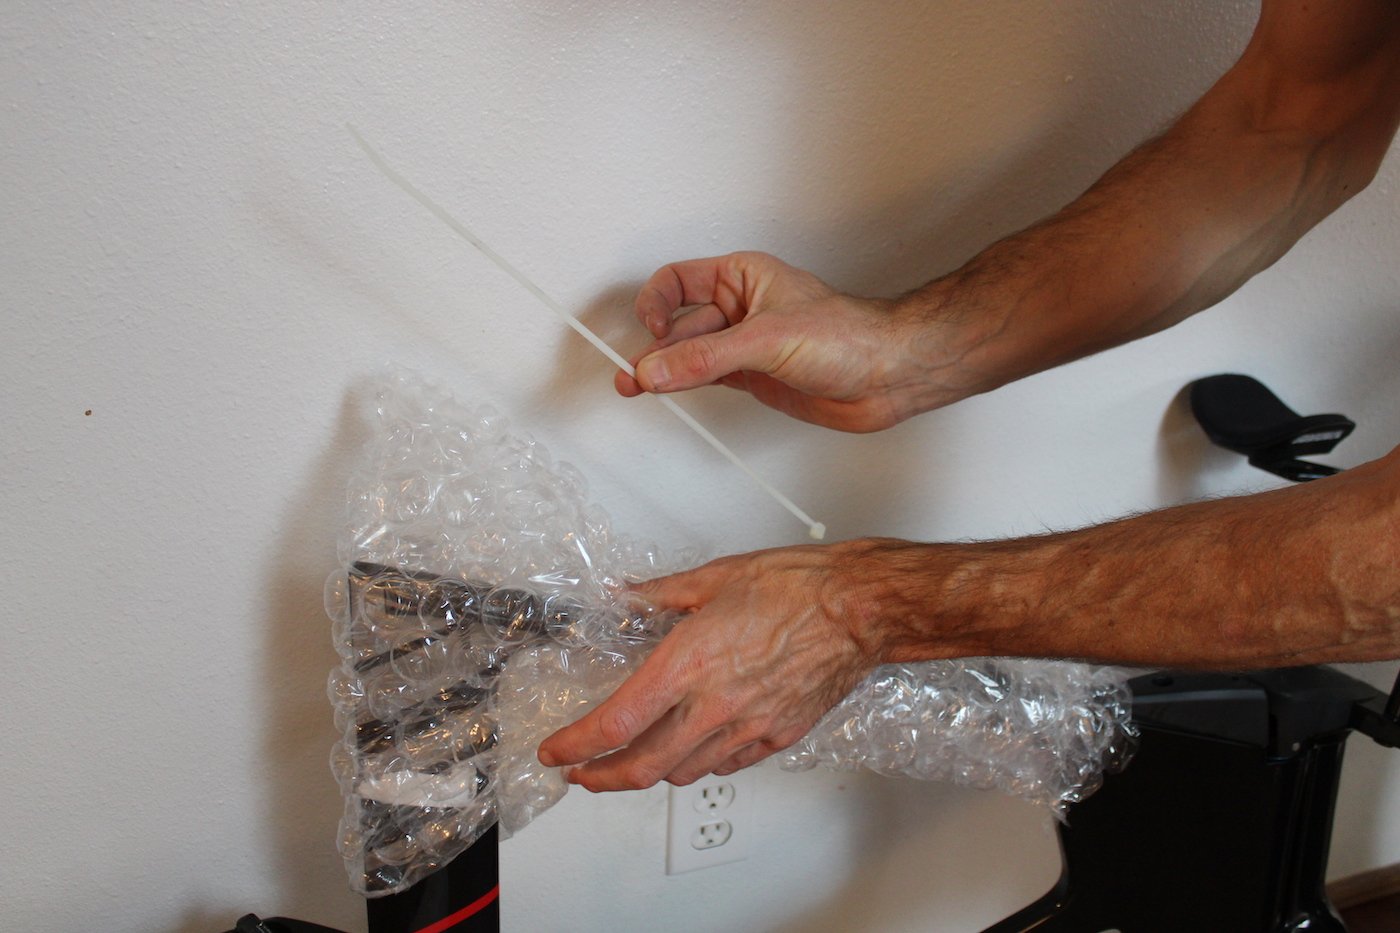
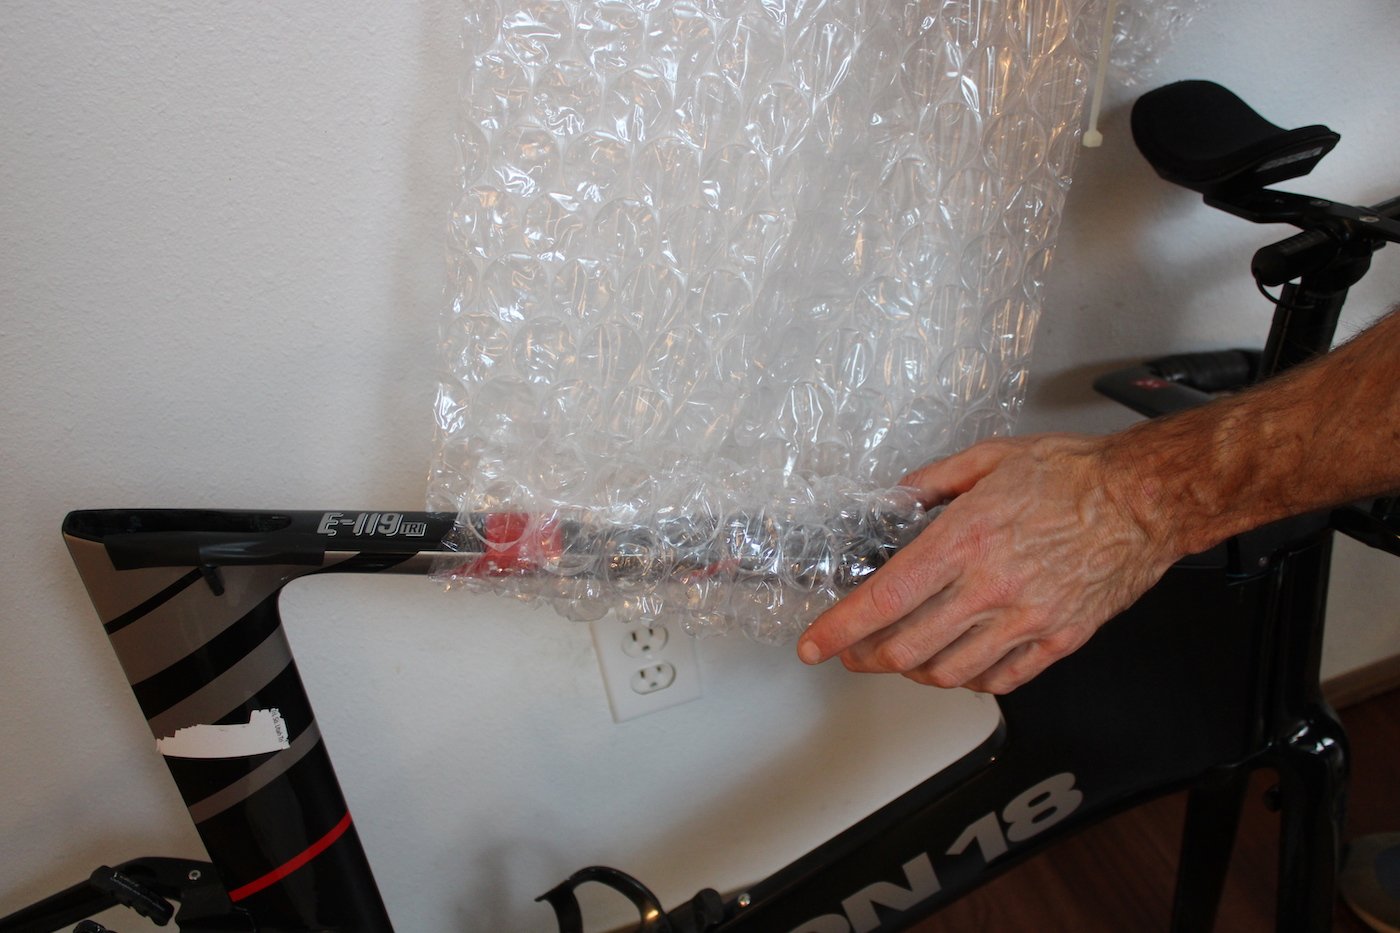
Protect that purple pearl paint job, yo! Seriously, a little padding helps a lot.
At the beginning of each season, go to your local FedEx or UPS or USPS and purchase a big roll of bubble pack. Wrap the top tube, down tube, seat tube, seat stays, chain stays, and fork arms with packing material. Wrap the crankarms and chainrings (chainrings will tear everything nearby—especially wetsuits!). Your bike should look like a plastic mummy. Without Brandon Fraser, unfortunately.
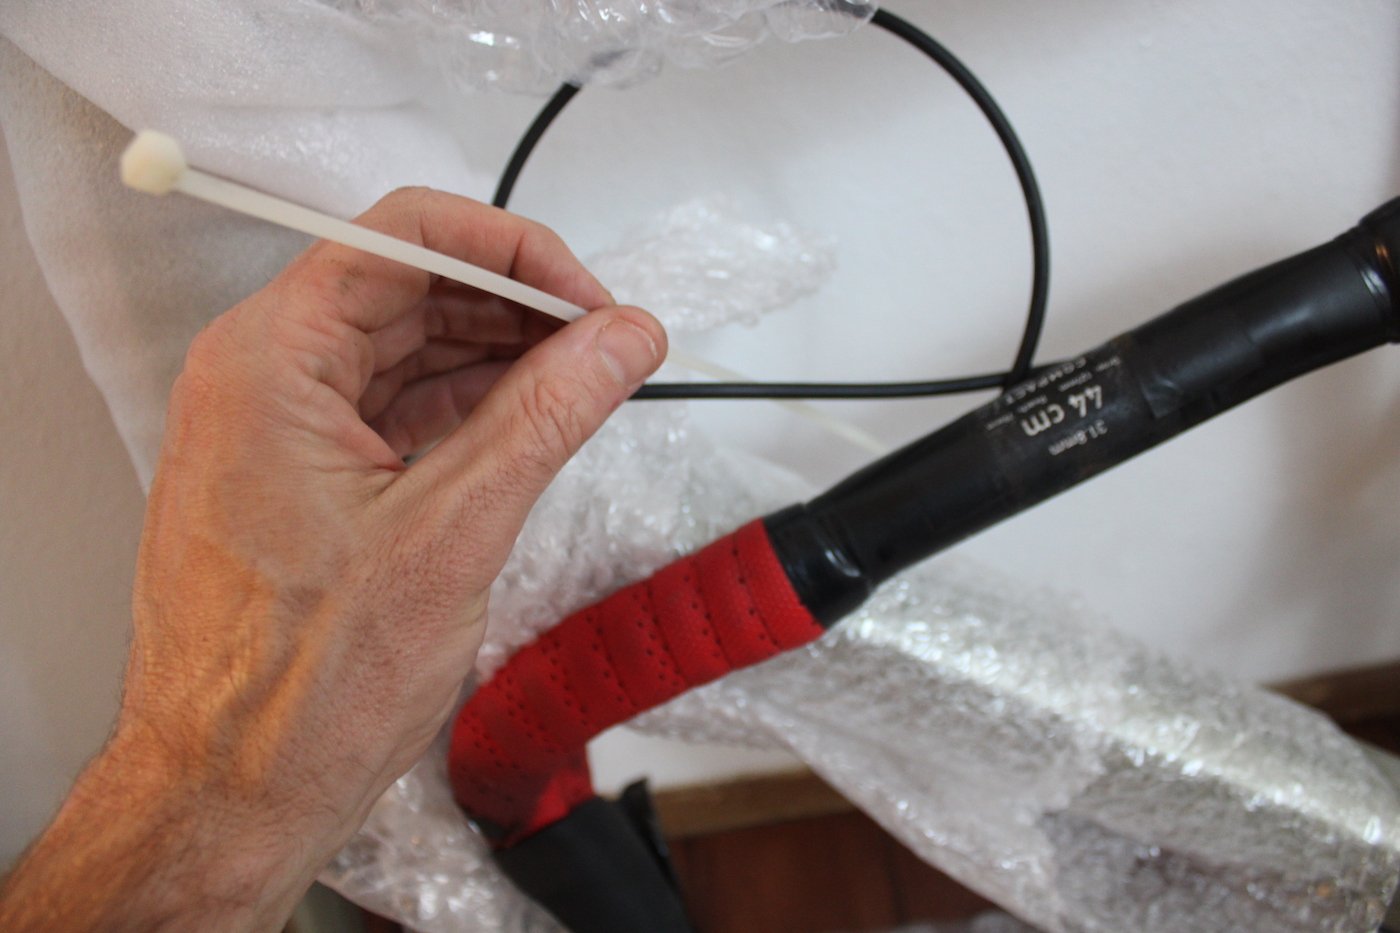
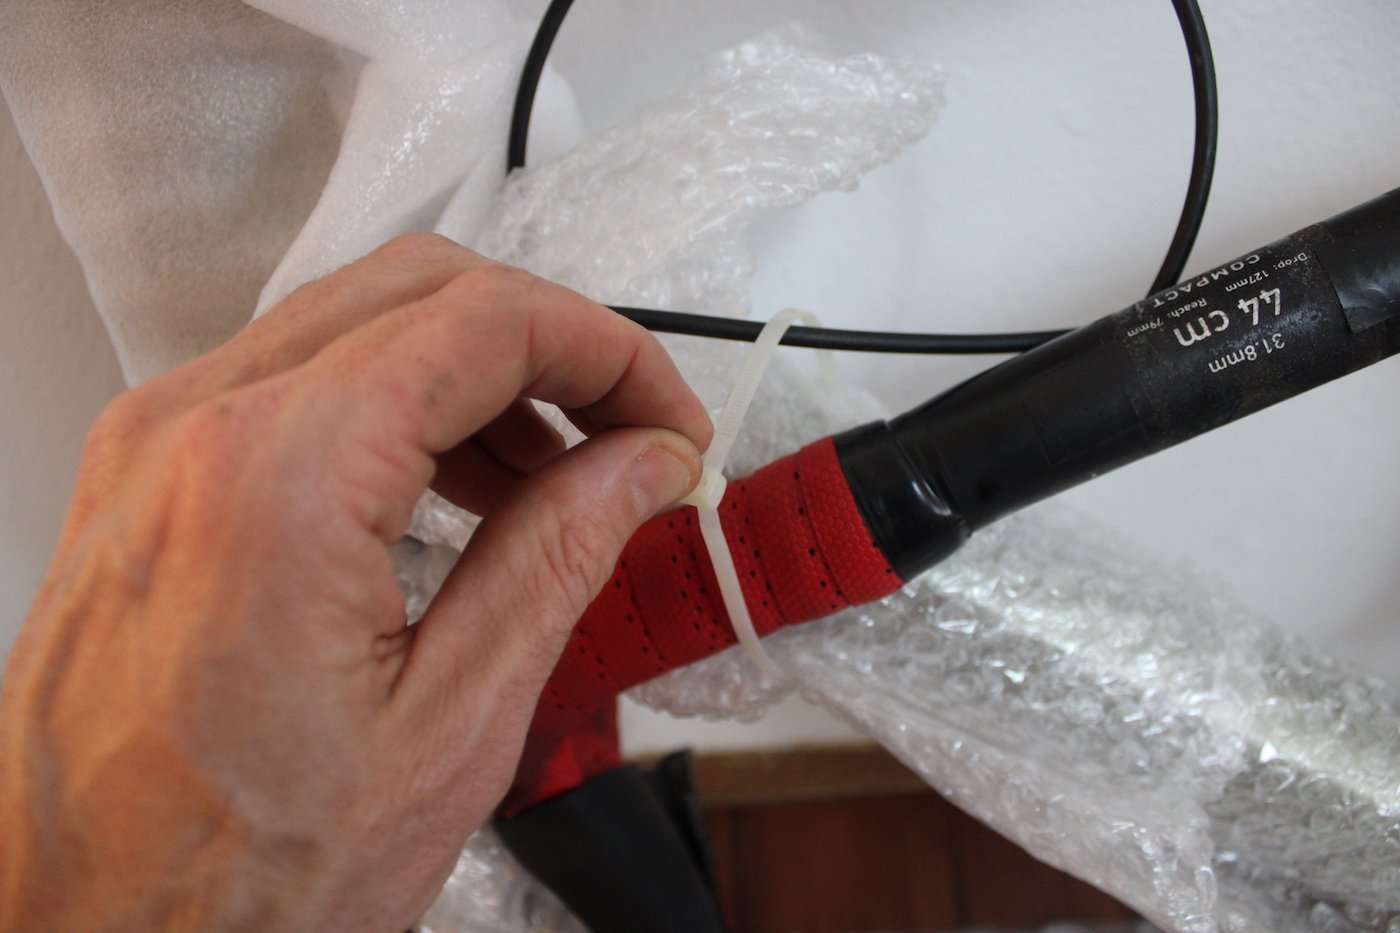
Your handlebars, after your chainrings, are the part of your bike most likely to damage what’s around them. We do this last so we know that the frame is protected.
Remove the stem bolts (you marked the handlebar, right?!), wrap the bars/aerobars in bubble wrap, and then lay the whole thing up against the frame. Secure the bars to the frame with zip ties and make sure a) no frame material is touching any other material and b) that nothing is moving, finally c) check again. You’ll want to ensure that the handlebars don’t stick too far out from the side of the frame, especially if you have a thin box.
Place Bike in Bag/Case
We’re almost there! The final step, when you introduce your mummified frame to its coffin for the next few days. Slide (or lay) the bike frame into the box/bag. If it’s a box, there will usually be large foam slabs you sandwich around the frame. Do that, making sure the foam insulates the frame from the box. If it’s a bag, make sure nothing fragile (a shifter, for example) is sticking out in such a way that it presses the bag outward.
Pack Soft Gear Around Bike
Security, plus a way to lighten your other bags! Remember, though, that you’ll need to keep the bag/box under 50 pounds! Most boxes weigh 15-20 pounds themselves, so you don’t have much wiggle room here. Wetsuit, bike shoes, helmet, running shoes. That’s probably it. Towels for padding.
Weigh It!
Know before you go! Repacking your bike in the check-in line is demeaning. Use your bathroom scale, or sweet talk that FedEx employee into letting use the scale at the store. Get it under 50 lbs. now, not when you’re strewing your underwear around JFK.
Conclusion
Packing your bike needn’t be stressful or scary. In fact, you’ll learn more about how your bike works, and be better equipped to fix your bike if and when something goes wrong with it, whether traveling or at home. Self-reliance is important in endurance sports, and now you can pack your bike to go wherever you’d like!